Monthly Archives: January 2025

Worm-Casting Tea

Perhaps you have used compost tea on your plants and saw the amazing effect it had. However, if you think your plants loved their compost tea, try giving them a drink of worm-casting tea. No, it’s not the liquid dripping from the bottom of an elevated worm bin – so what is it?

Making Worm-Casting Tea

This “tea” is a liquid concoction made by steeping worm castings (worm poop) in water. This is an extracting process that draws the nutrients from the castings into the water so they can be more easily and quickly absorbed by thirsty plants. Use it on your plants by drenching the soil around the roots or spray onto the leaves for foliar absorption. Both spraying and drenching eliminate the labor of spreading solid compost. And, applied as a liquid, plant resistance to pests and diseases and microbial activity in the soil are all increased. While compost tea contains many beneficial microbes, it’s nothing compared to worm-casting tea that contains a much larger and diverse microbial population due to the various physiological life processes of the worm.

To really kick up the benefits of worm-casting tea, try aerobically brewing a batch. This simple process increases the microbial populations by circulating the microbes in a nutritious and aerated solution to double the population every 20 minutes. This method also eliminates any possibility of E. coli, which can be present in both compost and worm-casting tea brewed by extraction.

To brew your worm-casting tea…

  1. Connect 3’ of tubing to an air stone. Attach other end to small air pump.
  2. Put 4 gallons of water into a clean 5-gallon bucket. Let sit for 24 hours to allow chlorine to dissipate. Alternatively, use non-chlorinated water.
  3. Add:
    1. ¼ cup sulfur free molasses or corn syrup
    2. 1 tablespoon water-soluble sea plant extract
    3. 2 tablespoons soluble fish power or liquid fish
  4. Plug in pump and place air stone at bottom of bucket to begin agitation.
  5. Add 4-8 cups earthworm castings, crushed into small bits, if possible.
  6. Brew until a froth or slime appears on the water surface. The smell should now be gone or very weak. This indicates the maximum population has been reached and no food remains for the microbes to eat. This solution may contain over one billion microbes per teaspoon of solution! The overall brewing time is temperature dependent, however, and warmer solutions will brew more quickly. At all times, leave the bubbler on to continue oxygenating the microbes.
  7. Strain the solution to remove any solid particles. Apply to plants as soon as possible to take maximum advantage of your tea’s nutritious properties.

Note: The odor should be minimal or vaguely pleasant. If the smell is strongly unpleasant or similar to sulfur, do not use. Pour it over some weeds for a natural herbicide instead.

You can use your worm casting tea anywhere in your garden: upper and lower sides of leaves, on flowers, vegetables, trees, shrubs or soil. Spray in the early morning or evening or in the shade during the rest of the day. Use the remaining castings as you would any compost, after all, they still contain a diverse microbial population!

Now, raise your teacup and toast to a healthy, luxurious garden and landscape, all thanks to nutritious worm-casting tea!

WormcastingTea_1

Don’t Miss Out on Brunnera macrophylla ‘Jack Frost’

Are you trying to add drama and beauty to your shady spots but keep finding only bland, lackluster plants? You won’t want to overlook Brunnera macrophylla ‘Jack Frost’ with its stunning appearance and easy care.

Introducing Brunnera macrophylla

Also called Brunnera-Heartleaf and Siberian bugloss, this plant is a stunner for its delicate foliage. The broad, heart-shaped leaves of ‘Jack Frost’ are dark green with a heavily frosted metallic silver overlay. This allows only the green veining to peep through, giving the plant a crackle-like finish with a thin green border. Sprays of tiny bright blue forget-me-not like flowers burst forth in mid- to late spring, growing well above the foliage on delicate stems.

Using Jack Frost in the Landscape

Excellent in a woodland garden, the genus Brunnera is a group of classic perennials valued as a shade tolerant ground cover. The variegated forms are slower to spread than most other species, making this cultivar ideal for smaller spaces where crowding may be a concern, such as around younger trees, in smaller beds or in borders along a shady fence, deck or pathway. This plant is fabulous as a specimen plant or may be massed to show off its phenomenal floral display. ‘Jack Frost’ would also make a wonderful addition to a shady container garden on a deep porch or covered deck. The flowers are long lasting when cut and can be lovely, delicate additions to arrangements. Because this plant is resistant to deer and rabbits, it can also be a favorite in wildlife-friendly areas.

Proper Care is Key

Brunnera is a woodland plant, and that must be kept in mind if it will be able to show off its full potential in your landscape. ‘Jack Frost’ should be grown in full shade and consistently moist soil in southern regions to mimic the thicket-like conditions it naturally favors. In the north, morning sun is acceptable as long as the soil remains moist and the temperatures in the sun do not rise too high. Although tolerant of many soil types, this plant will grow best rich soil. If needed, amend soil with lush compost to improve its condition and provide proper nourishment. Little care is needed once Brunnera is established. Cut back the old foliage in the spring rather than in the fall; it will help to protect the crown during the winter. A winter mulch is also recommended to help keep the soil moist and warmer to protect the roots.

Brunnera macrophylla ‘Jack Frost’ may not be widely known, but once you meet it, you’ll want to invite it to every shady part of your landscape!

jack-frost2

jack-frost

Rotating Your Vegetable Crops

Whether you just plant a few tomatoes, herbs and some lettuce or an elaborate garden complete with exotic selections of lesser known veggies, you’ll want to rotate your crops each year. All types of vegetable crops – brassicas, onions, legumes and root crops – require a slightly different blend of nutrients and trace elements, even if their light and water requirements are similar. If you always grow your tomatoes in the same place, eventually the soil will become exhausted of the nutrients that tomatoes require the most, and the crop will become weaker and less productive. Meanwhile, another vegetable could easily thrive in that location and its growth would help replenish the nutrients that tomatoes may need in future years. If you rotate crops in and out, you’ll enrich the soil and enjoy larger, more productive, more flavorful harvests.

The easiest way to rotate your vegetables is to use a 3-year plan. First, you’ll need to decide which vegetables you plan to grow, then divide them into these three main groups:

Group 1:
Peas
Beans
Celery
Onions
Lettuce
Spinach
Sweet Corn
Tomatoes
Zucchini

Group 2:
Cabbage
Cauliflower
Broccoli
Kohlrabi
Rutabaga
Turnip
Radishes

Group 3:
Beets
Carrots
Parsnips
Potatoes

It’s all right if you don’t plant to grow vegetables from each group. Simply adjust your rotation plan to compensate, or even consider trying out a new vegetable to complete the rotation and expand the variety of your garden.

Next, draw a plan of your garden and mark where each group of plants will go, keeping in mind the light and watering requirements of different varieties. It may help to sketch out the boundaries of each group, noting which plants are part of which rows, boxes, containers or beds. Keep those notes and sketches in your garden journal, and also take notes throughout the growing season about which plants perform best and which may be struggling. Next year, move the plants accordingly to shift where different crops are located. If you choose to add new vegetables to your garden, start them in the location with their appropriate group and bring them right into the rotation scheme.

As you rotate crops each year, you will notice consistently lush, healthy plants, bountiful harvests and delicious produce. After a few growing seasons, rotating your vegetable crops will be second nature and will be an important part of your gardening plan to ensure only the best comes from your garden.

rotating-crop-1

rotating-crop-4

rotating-crop-3

rotating-crop-2

Reaching New Heights with Tall Perennials

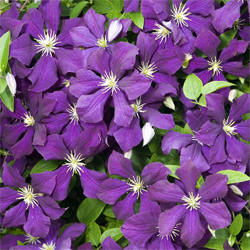
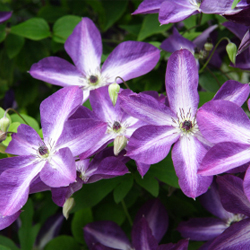
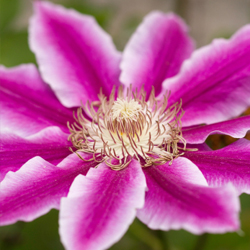
Did your garden seem to come up short last year? Were there areas where some height could have added excitement, texture and pizzazz to your landscape? If so, grab your garden journal and make some notes! We have an excellent list of perennials coming this spring and it’s sure to include the colors, heights and types of plants to add a vertical punch to your garden. Our top picks include…

Of course, this is just a partial listing of taller perennials available. Beautiful, healthy and vibrant plants will be arriving nearly every day, once the season starts. Make your wish-list and come on in to see us on a regular basis. That way, you’ll have the best selection of our incoming beauties and can choose the perfect tall plants to add a vertical lift to your garden

A Buffet of Berries for Winter Birds

Plants with berries add winter interest to the garden and also attract many different types of birds. But which berries are best for your yard, and how can you ensure a bountiful buffet for your feathered friends to enjoy?

Caring for Berries

No matter which berries you choose to add to your landscape, opt for varieties native to your region. When berries are native, they are more readily adapted to the local climate changes, including the temperature extremes of winter. Furthermore, regional birds will recognize the berries more easily and will enjoy them as a safe and familiar food source.

Plant berry bushes as early as possible so the plants have plenty of time to become established in your landscape and bear copious amounts of fruit for the winter. Water them well throughout the summer and fall to encourage a good crop of plump, rich berries. Avoid pruning the bushes in autumn, and instead leave the branches intact, complete with their tasty treats. Not only will winter wildlife enjoy the feast, but the extra shelter from unpruned bushes will also be appreciated.

Best Winter Berries

There are many different types of berries that can attract winter birds, but two standouts are top picks for winter interest, not only for the birds but for their beauty in the garden.

  • Hollies
    Offering long-lasting bird forage, this group of plants provides great cover and nesting sites as well as edible berries in shades of red, orange and yellow. And, because the berries ripen at different rates even on the same bush, hollies provide food for several months. Winterberry and American holly are easily pruned as shrubs or small trees and are almost always within pollinating range because they are natives. Birds that seek holly berries include robins, blue jays, eastern bluebirds, red-bellied woodpeckers and more, including grouse and quail. The sharp-edged foliage is also a deterrent to predators, and cut branches can be stunning holiday decorations if desired.
  • Pyracantha
    This easy to grow plant has a huge feathered following. In addition to different thrushes, bluebirds, woodpeckers, grouse and quail, pyracantha, or firethorn, also attracts cardinals and purple finches. The dense clusters of orange, yellow and red berries look like a blaze of fire in the winter landscape, and the thorny branches provide superior protection from predators as well as shelter from winter storms.

Winter birds will love the berries they can find in your yard, and you will love the visual interest and seasonal color these beneficial plants provide.

The Edible Garden

Who said fruits and vegetables can’t be show-offs in the ornamental beds? Mix fruits and veggies into your flower and shrub borders to add drama, texture, color and, most importantly, food!

Blueberries

Displaying white flowers tinged in pink in little tassels during late spring, blueberries will grow only in moist, peaty soil with a pH lower than 5.5. The best way to grow them is in an informal border or along a woodland setting with other acid-loving plants like rhododendrons. To ensure good pollination, two different cultivars should be planted together. Plants should be protected from birds with netting when the fruit begins to ripen. Apply cottonseed meal to the soil in spring, water regularly during dry summers and prune the plants in winter by cutting out dead or damaged branches. You can also lightly trim plants in spring to keep them compact. Blueberries are rarely attacked by insects or diseases, but will look pale and chlorotic if the soil is not acid enough.

Raspberries and Blackberries

Although not particularly ornamental, bramble berry bushes, when trained on wires, offer a nice summer screen, or they can be grown against a fence or wall. Both raspberries and blackberries require slightly acidic soil, adequate moisture and will need support. Plants will succeed in light shade, but prefer a sunny location. Mulch in early spring with manure or compost, then cut old canes down to the ground after fruiting in early to mid-summer. No more than 5-6 strong stems should grow from each plant. Protect fruit from birds and squirrels to ensure enough left to harvest.

Strawberries

In the past few years strawberry plants have become increasingly popular for their ornamental qualities. Beautiful white flowers with yellow centers become delicious, glowing red strawberries. When choosing cultivars, be sure to try both June-bearing and ever-bearing selections to extend your harvest. Alpine varieties are perfect for edging a path. Strawberries require deep, well-drained, nutrient-rich soil for the best results. Plant in early spring and replace plants every three years for the best-tasting berries and most productivity. Fertilize in spring and cut off runners as they form to keep plants fruiting well, unless you are starting new transplants. Spread salt hay around plants as fruit starts to develop to keep the berries free from soil and well ventilated. Protect from birds and watch for slugs and botrytis (moldy, grey fungus) during wet springs.

Grapes

Trained over an arbor or combined with clematis on a pergola, grapes add an elegant touch to any landscape. Plant grapes in well-drained, fertile soil where there is full sun. When growing on a trellis, limit your grapevine to a single stem or trunk. Train the leading shoot vertically and the lateral shoots horizontally. There are also various other ways to train and prune grapes, but do not let this task scare you. Grapevines are very forgiving. Birds will love the rich, aromatic fruit so you may want to protect several areas to ensure a good harvest.

Rhubarb

Offering beautifully colored stalks of pink, white or red, rhubarb can be grown in any kind of soil in a sunny spot. You can pick from this trouble-free plant from spring until early summer. Only the stems of rhubarb are edible; the leaves should be discarded. Add plenty of manure to the soil, keep damp during dry summers and remove tall stems before they produce flowers. Although decorative, larger stems tend to reduce plant vigor. Divide every five years or as needed to control plant size. Watch for tunneling insects on the leaves and treat with rotenone as needed.

Figs

Adding an air of distinction where space is limited, a fig tree can be grown in a large pot. Forgiving figs do well in poor soil, but need a sunny, protected area, which may mean a south-facing wall. These ancient trees tend to produce more fruit when their root systems are restricted. Therefore, when planting in the ground, it is a good idea to dig a hole about 3 feet wide and line with bricks. Mix plenty of bone meal in with the soil, too. Mulch fig trees in late spring with compost and water in dry weather while the fruit is growing. You can also encourage these trees to produce more fruit by pinching new shoots in spring.

With careful planning, it’s easy to mix beautiful edibles in with your landscaping beds, allowing you to do double duty with your gardening and landscaping combined and dramatically increase what you can harvest and enjoy.

Colorful Clematis – America’s Favorite Flowering Vine

When it comes to flowering vines, few can rival the excellent performance clematis provides with its profusion of colorful blooms, and this plant is largely pest-proof and disease-free. With a few tips, you can successfully grow America’s favorite vine in your garden this spring!

Selecting a Variety

Clematis comes in a wide variety of colors: purple, pink, red, lavender, mauve, blue and white as well as blends of more than one color. There are over 200 varieties in all, and most plants bloom for several weeks in May and June with a few sporadic flowers in fall. Others bloom in summer, and a few varieties flower from late summer into fall.

Choosing a Location

Clematis performs best in a spot that gets at least 6 hours of sun a day – this is especially true with later blooming varieties like ‘Lady Betty Balfour.’ They also need moist, well-drained soil. Because clematis climbs by curling or twining leaf tendrils, stalks or stems around a support system, a location with a trellis, arbor or fence is essential to provide adequate structure so the plant can show off its full beauty.

Planting

To give clematis a good start in your yard, dig a hole slightly deeper than the rootball of the plant and twice as wide. Add about one-third peat moss, compost or other organic matter to your soil to provide sufficient nourishment. Clematis prefers a neutral pH, so you may need to amend the soil with lime if your soil is acidic.

Without handling too much, plant the clematis rootball slightly above the ground and water well with plant starter fertilizer. Next, add about 2-3 inches of mulch, but keep the mulch away from the stem of the plant so as not to encourage stem rot. This layer of mulch is important because clematis prefers cool, moist roots. The mulch will also discourage weeds while the plant is getting established.

Maintaining Your Clematis

To assure full, healthy plants, you will want to prune your clematis back to about 12 inches the first and second spring. After then, you should refer to specific pruning instructions for each variety. Generally, the following pruning practices should be followed:

  • Type 1: Early Flowering Clematis (macropetala, alpina and montana types) – These plants produce flowers on wood that was grown the previous year and should be pruned within a month after flowering in the spring. Thin out weak or dead branches, lightly prune side branches to 1-2 buds and leave the main branch alone. Train or guide branches as required.
  • Type 2: Early Large-Flowering Clematis – These varieties bloom on the previous season’s wood and on new shoots, blooming from early to late summer. These varieties should have one-half of the previous summer’s growth pruned back in late winter before new growth starts. Remove dead or damaged stems and cut back all other shoots to where strong leaf-axil buds are clearly visible. Immediately after flowering, cut one-quarter to one-third off the main shoots to within a foot or so of the base. Water and feed well. Train or guide new growth as required.
  • Type 3: Late Small- and Large-Flowering Clematis – Cut these types back hard to the lowest pair of strong buds on each stem (usually about two feet) in late winter just as leaves begin to open. These varieties will bloom on wood produced in the upcoming spring months.

Clematis should be fed monthly during the growing season with 5-10-5 fertilizer or in early spring and again in early summer with a slow-release fertilizer. You will also want to check the pH of the soil periodically to keep it neutral, and refresh the mulch as needed to protect the roots. With just a little care and appropriate pruning, these lovely vines will bring gorgeous color and structure to your yard for years.

Top 10 Flowers for Your Spring Containers

All through the long winter months we eagerly await signs of spring, but the wait can seem much shorter when you are planning your beautiful spring containers. Not only can containers bring an early burst of spring to your deck, patio, or porch, but you can get creative and expressive with stunning flower choices for every container.

Why Plant Spring Containers?

Why plant spring containers when the natural growing season is right around the corner? Planting pots, barrels, and window boxes can extend the growing season and help you refresh your gardening skills before the rush of spring work. Containers are also less dependent on weather conditions and can easily be moved to warmer and sunnier spots even on chilly days. Spring containers can even be brought indoors to a porch, sunroom, or garage if a hard frost threatens, and your early spring gardening doesn’t need to be in danger. Containers are easy to care for and can brighten up any part of your yard or landscape before Mother Nature gets growing again. You can even use spring containers to experiment with new flowers and greenery before committing to adding it to your landscape.

Best Flowers for Your Spring Containers

With limited space in containers, you want to choose the very best spring flowers for brilliant color and thriving growth. Spring can be a temperamental season and may still have fluctuating temperatures and uneven moisture, so it is smart to choose flowers that can tolerate some light frost or even a small snowfall. The top flowers that can make a beautiful statement in spring containers include…

  1. Pansy – Along with their smaller cousins, violas, these classic spring flowers bring a burst of color to any container. Pansies are available in blue, purple, maroon, white, red, and yellow shades, and their delicate appearance evokes the hope and promise of the season.
  2. Daffodil – These beautiful spring bulbs are best planted in fall, or you can find blooming daffodils from the garden center. The bold yellow, white, and orange flowers are a cheerful spring accent, and daffodils are available in a range of sizes to suit any container.
  3. Stock – Stocks, or matthiolas, have a sweet scent perfect for spring, and these flowers are tolerant of cooler temperatures and light frosts, making them perfect for early spring containers. Choose from white, pink, purple, yellow, or orange varieties.
  4. Hyacinth – All types of hyacinths are spring favorites, and these bulbs come in different shades of pink, purple, blue, and white. Even the tiny “grape” varieties are ideal for spring containers, and all hyacinths can add fun textures to spring arrangements.
  5. Tulip – One of the most classic spring flowers, tulips come in a wide variety of colors and sizes, with different petal textures, like fringed, peony style, or parrot, for even more distinction. Choose variegated colors that standout or opt for classic colors in spring mixes.
  6. Primrose – Sweet and lovely, the primrose hints at summer but is cool tolerant and ideal for spring containers. These flowers come in a rainbow of hues, including blue, white, pink, yellow, and green, giving a wide range of colors to any container plan.
  7. Diascia – Ideal as a filler, Diascia, or “twinspur”, spreads rapidly to add lushness to larger containers. The bright green foliage is a fun spring color, and the blooms can be different shades of mauve, pink, coral, rose, and white, all accented with a bright yellow throat.
  8. Forget-Me-Not – The delicate, tiny blooms of forget-me-nots are a spring favorite, and their long blooming season means you can enjoy them even into early summer. These flowers come in different shades of blue and pink, perfect for spring arrangements.
  9. Dianthus – Also known as pinks, these flowers do indeed come in many pink shades, from deep jewel tones to cheery pastels and every hue in between. The dwarf species are popular for containers, and their frilly petals add texture to any arrangement.
  10. Calendula – A welcome addition to any spring container, this daisy-like flower, also called “pot marigold”, is frost tolerant and the colorful petals may be used for both medicinal and culinary purposed.

These are only a few flowers that are well suited to spring containers. Visit our garden center early in the season to find even more beautiful spring blooms to choose from.

Tips for Spring Containers

No matter what flowers you choose for spring containers, they need the best care to thrive through this often-temperamental season. Choose containers with cheerful spring colors for even more drama, or opt for neutral pots and containers such as concrete, wood, or wicker so the blooms will really stand out. Frost-free or frost-resistant pots can be the best choices in early spring or if your area is prone to late freezes. To further protect your spring containers, be sure you have appropriate covers or cloches in case of frost warnings, or add a layer of mulch or moss to top dress the pots and help insulate the soil and delicate roots of the plants.

Use good quality potting soil for your containers, and fertilize spring containers gently but regularly to promote the best growth and vibrant blooms. Take care not to overwater pots, balancing your watering regimen with Mother Nature’s spring rains. Pots should have good drainage to be sure excess water can easily flow away from the root zone. Placing pots on casters or stands can also help improve drainage and be sure the pots are not sitting in spring puddles.

To help your spring containers last as long as possible, deadhead the flowers regularly with sharp, thin pruning snips. This will keep the pots tidy and encourage reblooming for a longer flowering season, letting you enjoy every spring bloom well into the season.

Dormant Pruning With the Proper Tools

Late winter pruning is often recommended for many trees and shrubs. Pruning the plants while they are dormant is less stressful for the plant and it’s also easier to view the structure of deciduous trees and shrubs without leaves to ensure the pruning helps create the desired shape. It’s also a time of the year when late winter sunshine makes us all long to be in our gardens and pruning is an excellent job to get us out there.

Pruning Tools

To get out and get pruning, you will need the proper tools. There are several types of pruners that should be in every serious gardener’s tool shed.

  • Hand Pruners
    The simplest tool, but the hardest to choose, is the hand pruner. There are two distinct styles of hand pruners: the anvil type and the bypass. The anvil pruner is good for pruning deadwood or undesirable growth. For more valuable specimens anvil pruners tend to smash the wood during cutting, leaving the wound open to insects and disease. Bypass pruners are like a pair of scissors and give you an easier, cleaner healthier cut. Different hand pruners are available in different sizes and grip styles, including options for both right-handed and left-handed gardeners. To get the best results, it is important to choose a hand pruner that feels comfortable but still provides adequate strength for the job.
  • Lopping Shears
    Another tool that comes in handy is the lopping shear. They are used for making larger cuts up to 1-1/2″ in diameter, and have longer handles to provide more power without stress or strain. The longer handles also provide a better reach than hand pruners. They are also excellent for clearing away undesirable growth in your yard, including trimming hedges.
  • Pole Pruners
    The last tool you’ll need is a pole pruner. It is a combination lopping shear and pruning saw. The pole pruner extends out to twelve feet and can be used for making small cosmetic cuts or larger limb removals without needing to set up a ladder. Pole pruners are also useful in dense canopies when using a ladder would not be practical or suitable.

To learn more about pruning specific trees or shrubs and to choose the appropriate tools for the job, do a little research before venturing out. You want to be well equipped to make clean, appropriate cuts that will help your trees and shrubs look their very best.

Dormant Pruning

Dormant Pruning

Insects in Winter

Now that we’re in the throes of winter, do you ever stop and think, “Where did all the bugs of summer go?”

With the onslaught of frigid temperatures along with snow and ice, gardeners and homeowners alike hope and pray that these weather extremes will reduce local pest insect populations. But do they?

Well, there’s both good news and not-so-good news on this subject. For some insects, life ends when the cold begins; that’s the good news (well, maybe – read along for more on this). However, insects are known survivors, so for others, over time, they have developed methods of survival; that’s the not-so-good news.

The Good (well, maybe)

Let’s begin with the good news. Some insects die when the cold weather sets in. The only problem with this “good news” is that they have already taken steps to continue their legacy before they expire. Knowing that the end is near, these insects lay their eggs beforehand, ensuring a new generation come spring. If the eggs are laid above ground, there is a greater chance that they will not make it through a particularly harsh winter – this would include insects like bagworms whose egg casings hang from evergreen trees and shrubs where they are offered little protection from the elements. It also includes the red lanternfly, whose egg masses will not survive temperatures below 12 degrees Fahrenheit.

The Bad

As stated earlier in this article, many insects have developed a method for winter survival. Here are some of their tricks:

  • Migration – Just like some birds, some insects migrate to warmer areas to survive the cold.
  • Hibernation – Some insects have the capability of slowing their metabolism, just like a bear, to withstand wild winters.
  • Freeze Tolerance – A few insects that naturally come from areas with harsh winters have developed the ability to create a natural anti-freeze in their bodies to prevent ice from forming, thus ensuring their winter survival.
  • Freeze Avoidance – Still, other bugs simply avoid the bad weather. This is by far the most popular method of insect winter survival. These pests will bury deep into the soil, disappear into rotting logs and leaf piles, or slink into our homes for warmth and comfort.

The Reality

The reality is that you can’t count on winter to make a big difference in yearly pest control, even when the winter is extreme. It is far more effective to have several approaches in place to create an effective pest defense strategy.

  • Familiarize yourself with local pests and their lifecycles. As always, knowledge is power.
  • Make sure you know the difference between a “good” and a “bad” bug before attempting to eliminate them.
  • Monitor your home and garden regularly for pest infestations to gain the upper hand on any potential pest problem.
  • Stop by Poor Boy’s garden center for insect identification and the safest treatment recommendations, such as natural repellents, pest management tactics, companion plant suggestions, and beneficial insects.

Insects in Winter
Insects in Winter
Insects in Winter